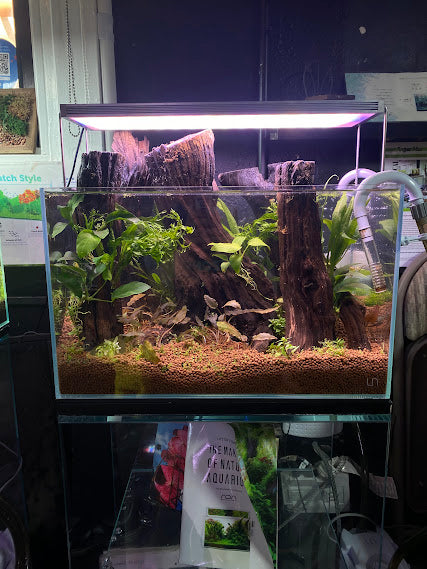
For most freshwater tanks, a hang-on-back (HOB) filter rated at roughly 4-6 times the tank's volume in GPH is the right starting point — easy to install, easy to service, and strong enough for standard community stocking. Canister filters make sense once a tank gets larger, more heavily stocked, or more heavily aquascaped; sponge filters earn their place with shrimp, fry, bettas, and quarantine tanks, where gentle flow matters more than raw turnover. Every one of these designs is doing the same underlying job — straining debris, housing bacteria, and sometimes polishing water chemically — just packaged differently.
Picking the wrong filter type rarely sinks a tank on its own; picking the wrong size, or servicing it the wrong way, is what usually causes trouble. This guide covers the main filter types, how to size one correctly, which order filter media actually belongs in, and how to clean each type without wiping out the bacteria colony that makes the whole thing work. If you haven't yet, our cycling guide covers what that bacteria colony does and how long it takes to establish.
Filter types at a glance
| Type | Best for | Pros | Cons |
|---|---|---|---|
| HOB (hang-on-back) | Most beginner and community tanks | Cheap, no drilling or tubing, fast to service | Visible on the back rim; limited media capacity vs. canister |
| Canister | Larger, heavily stocked, or aquascaped tanks | Large media capacity, equipment hidden below the tank | Costs more; priming and hose setup take more effort to service |
| Sponge | Shrimp, fry, bettas, quarantine/hospital tanks | Gentle flow, inexpensive, great for seeding a new tank | Lower mechanical filtration; needs an air pump or powerhead |
| Internal (submersible power filter) | Small tanks and nano setups | Compact, sits fully inside the tank | Takes up interior space; small media capacity |
| Undergravel (UGF) | Mostly legacy setups today | No visible equipment above the substrate | Mainly biological only; makes deep substrate vacuuming harder |
Treat "best for" as a starting point, not a rule — a well-sized sponge filter can run a community tank, and plenty of shrimp keepers run HOB filters with a pre-filter sponge over the intake instead. The right choice usually comes down to tank size, stocking, and how much you mind seeing the equipment.
Hang-on-back (HOB) filters
An HOB filter clips onto the tank's back rim, pulling water up through a media cartridge or basket and returning it over a small waterfall lip, which doubles as useful surface agitation. It's the default recommendation in our own setup & equipment guide because almost nothing about running one is fussy: media swaps take seconds, there's no tubing to prime, and you can see at a glance whether it's flowing properly. The tradeoff is capacity — an HOB basket holds noticeably less media than a canister's trays, which is the main reason larger or heavily stocked tanks outgrow one.
Canister filters
A canister filter sits outside the tank — on the floor or in a cabinet — sealed and connected by intake and return tubing, with the motor pushing water through internal media trays before returning it to the tank. The sealed design holds far more media than an HOB basket, which translates to more biological capacity and longer stretches between cleanings. That makes canisters a natural fit for larger tanks, heavy waste producers like cichlids and goldfish, and aquascaped tanks where keeping visible equipment off the rim matters. The cost is setup and service complexity: priming the lines, keeping fittings sealed, and occasionally backflushing tubing are all extra steps an HOB filter doesn't ask for.
Sponge filters
A sponge filter is a block of porous foam driven by an air pump (via an airstone-style lift tube) or a small powerhead, with water pulled gently through the foam rather than pushed hard through a motor intake. That gentle flow is exactly why sponge filters are the standard choice for shrimp and fry tanks — a powerful HOB or canister intake can pull baby shrimp and fry straight into the impeller, where a sponge simply can't. The same gentleness makes sponge filters the go-to for betta tanks (low flow tolerance) and quarantine or hospital setups, where you often want filtration without disturbing a sick or stressed fish. A mature sponge filter is also one of the fastest ways to seed a brand-new tank, since it's easy to transfer straight from an established tank without disrupting the rest of that tank's filtration.
A sponge filter doesn't have to be a tank's only filter. Running one alongside an HOB or canister adds biological capacity, gives fry and shrimp a gentler intake to use, and keeps the tank filtered if the primary filter needs servicing — a common setup on breeding and planted tanks alike.
Internal filters and undergravel filters
Internal (submersible) power filters sit entirely inside the tank, usually tucked in a back corner, and suit small or nano tanks where there's no room to hang or plumb anything external. Undergravel filters (UGFs) — plates laid under the substrate with an airlift or powerhead pulling water down through the gravel — were once the default budget filter but have mostly fallen out of favor; they filter biologically more than mechanically, and a deep gravel bed over one makes a thorough substrate vacuum harder, since you don't want to disturb the plate itself. Both still show up in specific setups (nano tanks for internal filters, some planted or breeding tanks for UGFs), but neither is a default recommendation for a first tank today.
Sizing a filter: GPH and turnover rate
A filter's flow rate is rated in GPH (gallons per hour), and the simplest sizing rule of thumb is a filter rated at roughly 4-6 times your tank's total volume every hour — a 20-gallon tank is comfortably served by a filter rated around 100-150 GPH. Lean toward the higher end for heavily stocked or messy fish (goldfish, large cichlids, big plecos), and it's fine to sit toward the lower end for lightly stocked, heavily planted tanks or species that dislike strong current, like bettas and some gouramis and killifish. Keep in mind the GPH on the box is a best-case number — packed filter media typically cuts real-world flow by a meaningful margin, which is one more reason to size a little above the minimum rather than right at it.
Filter media order: mechanical, biological, chemical
Inside any filter with removable media — almost every HOB and canister — the order matters, and it follows the direction water actually flows through the unit:
- Mechanical first. A coarse sponge or floss pad sits where water enters, trapping the largest debris before it ever reaches the biological media. Skip this layer, or let it stay clogged, and that debris buries the bacteria colony downstream instead.
- Biological in the middle. Porous media like ceramic rings or bio-balls hosts the bacteria colony that actually processes ammonia and nitrite. It belongs in the cleanest part of the flow path, protected by the mechanical stage ahead of it.
- Chemical last. Activated carbon or a resin like Purigen sits closest to the outflow, so it's the last thing touching the water before it returns to the tank (Aquarium Co-Op, What Order Should Filter Media Go In?).
Not every tank needs all three stages running at once — a cycled, lightly stocked tank can often skip chemical media entirely, and plenty of experienced keepers run mechanical and biological only, adding carbon only after medicating or when clearing a tannin or odor issue. At minimum, keep one mechanical stage and one biological stage in place.
Cleaning and replacing media without crashing your cycle
| Media type | How often | How |
|---|---|---|
| Mechanical (sponge, floss, pads) | Whenever clogged or flow slows | Rinse in water removed from the tank, not tap water |
| Chemical (carbon, resin) | Roughly every 1-2 months | Replace outright — exhausted carbon can release what it trapped back into the water |
| Biological (ceramic rings, bio-balls) | Rarely — only if visibly clogged | Rinse gently in tank water; can last years undisturbed |
The one rule that matters most across all three: rinse media in water removed during a water change, never under the tap. Tap water is treated with chlorine or chloramine specifically to kill bacteria, and it can't tell the difference between water-main bacteria and the colony living in your filter (Chewy, How Often to Replace Aquarium Filter Media; That Fish Place, Aquarium Filter Maintenance). If a filter has multiple mechanical pads, clean or replace them in rotation rather than all at once, for the same reason you'd rotate substrate sections during a gravel vacuum — give the bacteria colony time to recover between disruptions instead of hitting it from every direction at once.
Mistakes that quietly undo a filter's work
- Rinsing biological media under the tap. The single most common way a healthy, cycled tank suddenly spikes ammonia again.
- Replacing all media at once. Swapping every pad and all the biological media in the same cleaning removes most of the bacteria colony in one step.
- Leaving exhausted carbon in the filter for months. Past its useful life, it can leach back what it absorbed instead of holding onto it.
- Undersizing for the fish, not just the tank. A filter sized for a lightly stocked 29-gallon won't keep up once it's holding a group of goldfish or large cichlids — size to bioload, not just gallons.
- Skipping the mechanical stage. Without it, debris settles directly into the biological media, clogging it faster and making real cleanings more disruptive than they need to be.
What's the best filter for a beginner freshwater tank?
A hang-on-back (HOB) filter is the usual starting point. It's inexpensive, easy to install without any drilling or tubing, and easy to service — you can inspect and rinse the media in seconds without disturbing the substrate. Size it to roughly 4-6 times your tank's volume in GPH and it will comfortably handle most beginner stocking.
Do I actually need a canister filter?
Only in specific cases: larger tanks (roughly 40+ gallons), heavily stocked or messy fish like cichlids and goldfish, or planted and aquascaped tanks where you'd rather hide the equipment and intake/outflow in the cabinet below. A well-sized HOB or sponge setup is perfectly adequate for most standard community tanks, so don't feel you need to upgrade just because canister filters look more serious.
Are sponge filters strong enough to run a tank on their own?
Yes, for the tanks they're suited to — shrimp, fry, bettas, and quarantine or hospital tanks, where gentle flow matters more than raw turnover. For a standard community tank, a sponge filter works well as a second filter alongside an HOB or canister, adding biological capacity and a safety net if one filter needs servicing, rather than as the sole filtration.
What order should filter media go in?
Mechanical first, biological in the middle, chemical last, following the direction water flows through the filter. Mechanical media (sponge or floss) catches debris before it can clog or bury the biological media's bacteria colony; chemical media like carbon sits closest to the outflow, so it's the last thing touching the water before it returns to the tank.
How often should I clean or replace filter media?
Mechanical media (sponge, floss, pads): rinse whenever it looks clogged or restricts flow, in water removed from the tank, not tap water. Chemical media like activated carbon: replace roughly every 1-2 months, since it stops absorbing and can release what it trapped back into the water if left too long. Biological media (ceramic rings, bio-balls): rinse gently only if it clogs, and otherwise leave it alone — it can last for years and is the one component you don't want to disturb.
Why does my filter's bacteria colony crash after cleaning?
Almost always from rinsing biological media in tap water. Chlorine or chloramine in municipal water kills the same beneficial bacteria it's added to kill in water mains, wiping out a colony that took weeks to establish. Always rinse biological media in water removed from the tank during a water change, and never replace all of it at once — rotate sections if you must replace any.